Use the flat side of a dry brush to create rough textures.
Rough wood or bark, stones, lichen, altocumulus clouds, or disturbed water surfaces can be created by drawing the flat side of a dry brush across the paper.
The painting must be on textured paper; the technique doesn’t work with smooth, hot-pressed paper. And courser textures will result in a rougher effect.
Wait until the painting is completely dry. Then select a brush with a broad, somewhat stiff belly (that’s the technical term for the flat side of a brush). Barely tap the belly into the pigment. As the name of the technique suggests, the brush should be as dry as possible. Then draw the side of the brush across the paper, leaving behind a smattering of paint. Don’t press the brush to the paper; just let it contact the raised bumps.
Allow the painting — and the brush — to dry again before adding additional layers or colors. The dry brush technique, like almost everything else associated with watercolor painting, requires patience.
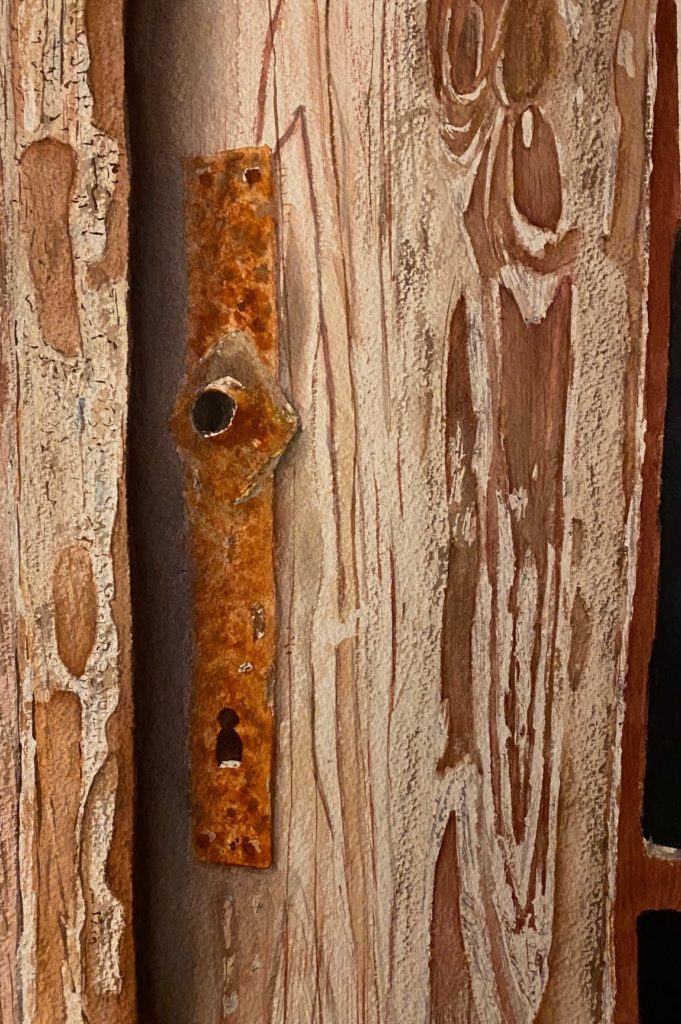
In the painting below, I used the dry brush technique to create the rough texture of unfinished, somewhat decayed wood. I applied multiple colors: light gray, dark gray, and various shades of reddish-brown. I tried to keep each application as sparse as possible so as not to cover up the underlying light tan of the main wood surface.
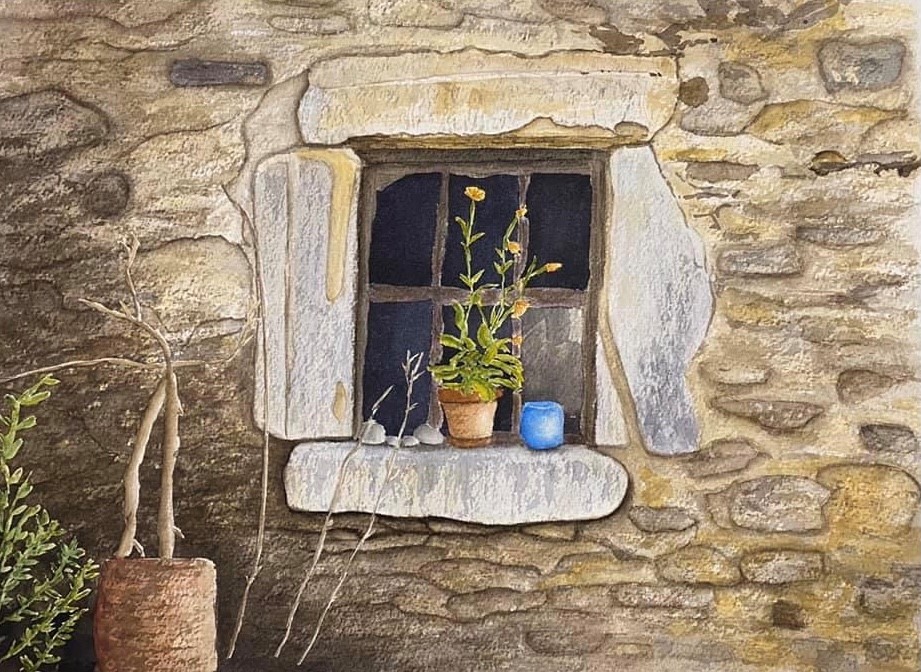
In the painting of the cottage, I used a dry brush to create the weathered texture on the stones. For the flat slabs of stone on either side of the window, I drew the brush straight down. For the stones in the wall, I used curve strokes to capture the roundness of the individual stones. The window sill was especially challenging, as I needed different stroke angles and shadings to capture the top and front of the rock. For the sill, I put a little more paint on the brush and drew it from the “back” of the sill to the front edge, then down. This created a texture that was darker at the back, as if in the shadows, and lighter on the vertical face, as if in the sunlight.
