I first heard of watercolor pouring a few months ago. I looked at a few tutorials on YouTube and it looked interesting. I had it on my list to do someday.
I’ve done many, many acrylic pours (love doing those!) How different can it be? Well… very different.
I ordered this book on Amazon:
Pouring Light: Layering Transparent Watercolor
I read the book, cover-to-cover. I love learning new things, so off I went!
I did a little test-project of pouring the background. Then finished with gouache for my sweet Cucumber.
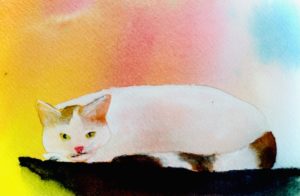
Not too bad for my first pour. I didn’t mask the cat, just covered it with white gouache. It was a test painting, and to be honest, I didn’t want to wait for masking to dry. Yes, I’m that impatient. haha!
Now on to the big project!
With watercolor pouring, there are many layers of pours with masking between.
LOTS of drying time required. Lots. I’m not sure I emphasized that enough.
LOTS OF DRYING TIME REQUIRED. There, that’s better. I think you get the idea. 🙂
I admit I got lost with what-and-when-to-mask a few times on this. It would have turned out better, and needed less white gouache at the end had I followed directions better.
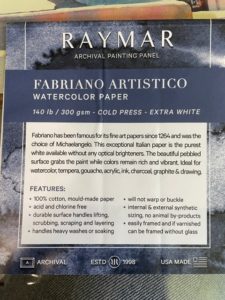
So here is my journey on this project. I used an aluminum panel with Fabriano Artistico paper adhered to it. First time using this. Wow… so nice. No buckling or warping throughout the entire process. Now I want to use this for all my paintings! (Diann’s bank account: “sorry Diann… it’s too expensive to use these for every painting. Special occasions only, and it better be very special!”)
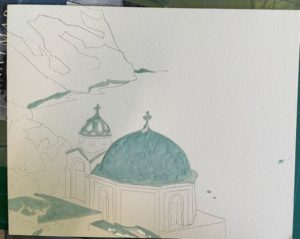
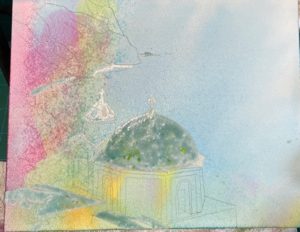
Outline on the paper. I was worried my lines were too dark. But they weren’t. With all the pouring layers, it could have been darker. It was tough to see the lines towards the end. First masking layer of the lightest values.
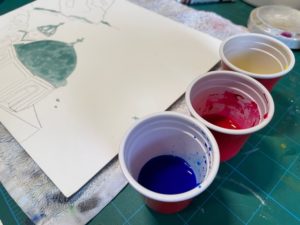
Mixed up paints in little 2 oz cups. Jean mentioned in her book several times to make more paint than you think you’ll need. (yes, we’re on first-name basis. We’ve been through so much together with this project.)
First pour. Hansa Yellow Deep, Quin Rose, and Phthalo blue.
second pour, same colors.
I didn’t think the water was dark enough, so I did another pour. Then did the next layer of masking
Another pour over the new masking.
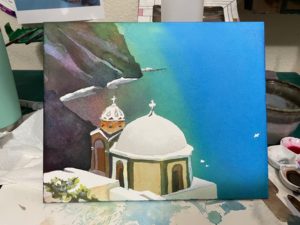
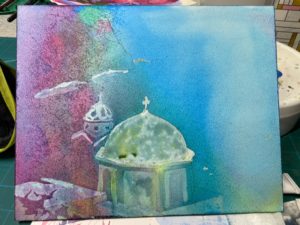
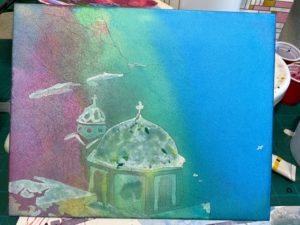
Removed the masking! Next step was to add details. I didn’t like the values on the buildings, believe they were too dark. So I tried to fix some of it with white gouache.

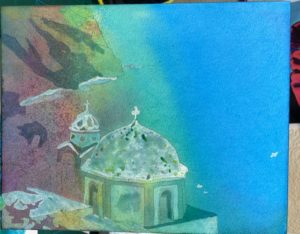
Final. I love the distant mountain, and love the water. The buildings are a bit overdone. I’ll know better next time. Huge thanks to Jean (remember we’re on first-name basis) for the detailed directions in the book!
Watercolor paint used:
For info on other books I’ve painted from, click here.
#ad As an Amazon Associate I earn from qualifying purchases.
Recent Posts
 Watercolor Challenge: The MoonIn Weekly ChallengeJuly 17, 2026
 Watercolor Challenge: WatermelonIn Weekly ChallengeJuly 10, 2026
 Watercolor Challenge: ButterfliesIn Weekly ChallengeJuly 3, 2026
 World Watercolor Month – July 2026In Weekly ChallengeJuly 1, 2026
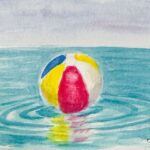 Watercolor Challenge: Beach BallsIn Weekly ChallengeJune 26, 2026